Installing SketchUp
After downloading the installation file for your operating system, you are ready to install SketchUp on your device. You don't need to delete previous versions of SketchUp before installing or updating.
Important Note about Graphics Cards and System Requirements: We recommend having the most current drivers installed for your graphics card, and checking to see if your computer meets our System Requirements.
Windows Installation Instructions
Known Issue: Windows Defender Installation Warning
During the installation process, some Windows users may encounter a Windows Defender notification stating that the SketchUp application is unrecognized. This is an error and the SketchUp team is working to resolve it.
To proceed with the installation, click More info and select Install anyway. SketchUp will then continue with your installation.
Open the downloaded Installer file as an Administrator. You may see a security prompt and will need to give SketchUp permission to make changes (install) on your computer.
- When the installation window opens, you'll see a list of products available to install including two SketchUp Studio features, Scan Essentials and Revit Importer.
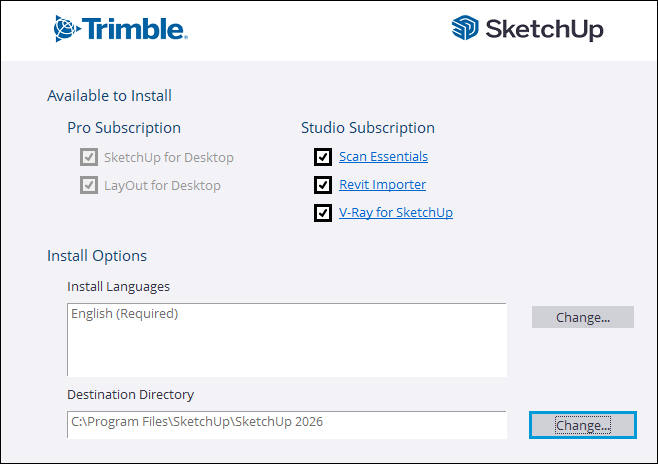
Note: V-Ray for SketchUp requires additional installation steps. If you choose to install V-Ray for SketchUp, take a look at our Installing V-Ray for SketchUp article.
To change what language you want to use, click Change... next to Install Languages.
Click Change... next to the Destination Directory to change where you want to install your SketchUp files.
Tip: SketchUp works best when saved locally, and we recommend keeping SketchUp installed on your devices main hard drive.
Click Install. A window will appear helping you keep track of your installation progress
Once you see the "SketchUp is Ready to Go!" message, the installation is complete. You can click the SketchUp logo to launch SketchUp right away, or click Finish to close out the installer.
(Optional) Restart your computer.
MacOS Installation Instructions
Before installing SketchUp, make sure you're logged into your computer as a user who has Administrator privileges.
Close any open versions of SketchUp, Layout, and StyleBuilder.
Tip: You may also want to remove any existing SketchUp icons associated with previous versions from your dock to avoid version mixups.
Locate and double-click on the .
dmgfile. This will mount the installer drive and opens the installation window.Dragging and dropping the SketchUp folder in the Applications folder copies the application to your computer.
A progress bar appears as the files are copied. When complete, SketchUp is installed and can be opened from your applications folder.